

NuWave Infrared Oven Instruction Manual: A Comprehensive Guide
Welcome! This manual details the NuWave Oven’s innovative cooking technology, offering faster, more efficient meal preparation. Explore features, safety, and recipes for optimal results.
Understanding Your NuWave Oven
The NuWave Oven represents a significant departure from traditional cooking methods. It’s designed for speed, efficiency, and retaining natural food flavors. Unlike conventional ovens that heat from the outside in, the NuWave utilizes infrared technology to penetrate food directly, cooking it from within.
This unique approach results in significantly reduced cooking times – often up to 50% faster! The oven’s compact size and lightweight design also contribute to its versatility, making it ideal for smaller kitchens, RVs, dorm rooms, or as an additional oven during large gatherings. Understanding these core principles is key to maximizing your NuWave Oven experience and enjoying consistently delicious results.
What is Infrared Cooking Technology?
Infrared cooking utilizes radiant heat waves to directly penetrate food, exciting water molecules and generating heat from the inside out. This differs from conventional ovens which rely on conduction and convection, heating the air around the food. The NuWave Oven’s infrared technology ensures faster cooking times and superior moisture retention.
Because heat is generated within the food, surfaces become beautifully browned and crisp while interiors remain juicy and tender. This method minimizes nutrient loss and preserves natural flavors. It’s a healthier alternative to deep frying, delivering similar textures with significantly less oil. Understanding this core technology unlocks the NuWave Oven’s full potential.
The 3-Way Cooking Method: Infrared, Conduction, and Convection
The NuWave Oven’s efficiency stems from its unique 3-way cooking system. Infrared heat penetrates food internally, while conduction directly heats the cooking surface for browning and crisping. Simultaneously, convection circulates hot air, ensuring even cooking throughout. This synergistic approach dramatically reduces cooking times – up to 50% faster than traditional ovens!
This combination seals in moisture, resulting in incredibly flavorful and juicy dishes. Conduction enhances roasting and flavor development, while convection eliminates hot spots. Mastering this method allows for perfectly cooked meals, consistently delivering exceptional results with every use. It’s the key to the NuWave’s versatility.
NuWave Oven Models: A Comparison (Pro Plus vs. White)
The NuWave Pro Plus and White models offer distinct features. The Pro Plus boasts precise digital temperature control, enabling customized cooking for various dishes. It also features superior infrared heat distribution, leading to faster and more even results. Conversely, the White model utilizes a simpler, manual interface, offering straightforward operation.
While both leverage the 3-way cooking method, the Pro Plus’s increased power and advanced controls provide enhanced performance. The White model is a cost-effective option for basic cooking needs, but lacks the Pro Plus’s refined precision and versatility. Durability and consistent heating are also superior in the Pro Plus.
Setting Up Your NuWave Oven
Initial setup is straightforward for quick cooking! Begin by carefully unpacking all components – the oven base, cooking dome, extender ring, and rack. Ensure all packaging materials are removed. Place the oven on a stable, heat-resistant surface with adequate ventilation. Before first use, wipe down the interior with a damp cloth.
Familiarize yourself with the control panel, noting the power button and temperature/time settings. The included instructional DVD provides a visual guide. Properly positioning the dome is crucial for efficient infrared heat circulation. Connect the power cord to a grounded outlet, and you’re ready to begin!
Initial Setup and Component Identification

Let’s identify the parts! Your NuWave Oven includes the main oven base, housing the heating element. The distinctive cooking dome focuses infrared heat. The extender ring increases cooking capacity for larger dishes. A cooking rack supports food, promoting even cooking. You’ll also find a user manual, recipe book, and instructional DVD.
During setup, ensure the dome sits securely on the base, aligning properly. The extender ring attaches to the dome when needed. Familiarize yourself with the power cord and control panel layout. Refer to the manual’s diagrams for clear component identification before your first use – this ensures optimal performance!
Powering On and Basic Controls
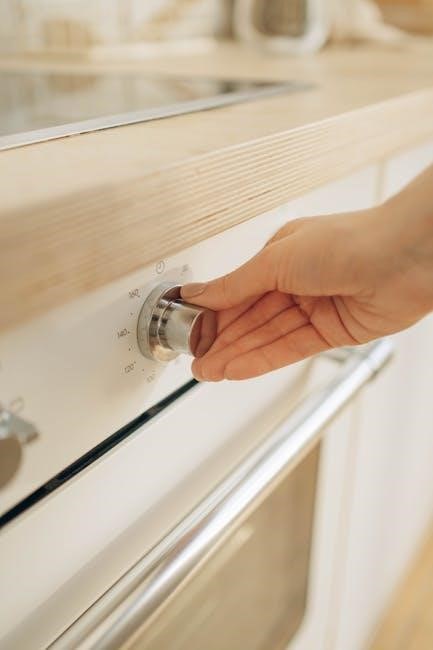
Getting started is simple! Plug the NuWave Oven into a grounded electrical outlet. For the standard model, use the dial to set the cooking time – typically ranging from minutes to an hour. The temperature is often pre-set, but Pro Plus models offer digital temperature control.
The power indicator light illuminates when the oven is on. Adjust the timer dial to your desired cooking duration. Monitor the cooking process through the transparent dome. Remember to always use oven mitts when handling hot components. Refer to the recipe book for suggested times and temperatures for various foods.
Cooking with Your NuWave Oven
Unlock culinary possibilities! The NuWave Oven excels at cooking a diverse range of foods. Begin by placing food directly on the cooking surface or within appropriate accessories like racks or pans. Utilize the 3-way cooking method – infrared, conduction, and convection – for optimal results.
For best outcomes, consult the included recipe book for specific cooking times and temperatures. Pro Plus models allow precise temperature adjustments. Regularly check food during cooking, adjusting time as needed. Remember, infrared heat cooks from the inside out, retaining moisture and flavor. Experiment and enjoy!
Recommended Cooking Times and Temperatures
Achieve perfect results! Cooking times and temperatures vary based on food type and quantity. Generally, meats and poultry benefit from temperatures between 350°F and 400°F. Vegetables typically require lower temperatures, around 300°F to 350°F. Baking often utilizes 325°F to 375°F.

The included recipe book provides detailed guidelines. For the Pro Plus model, utilize the digital temperature control for precision. Always check for doneness using a food thermometer. Remember these are starting points; adjust based on your preferences and the oven’s performance. Experimentation is key to mastering your NuWave Oven!
Using the Digital Temperature Control (Pro Plus Model)
Precision at your fingertips! The Pro Plus model features intuitive digital temperature control. Use the “+” and “-” buttons to set the desired cooking temperature in increments of 5 degrees. The display clearly shows the set temperature and remaining cook time;
Press “Start” to begin cooking. You can adjust the temperature mid-cycle if needed. Utilize pre-set programs for common foods, or manually input your preferred settings. Consistent temperature monitoring ensures even cooking and optimal results. Refer to the recipe book for suggested temperatures for various dishes.
Cooking Different Types of Food
Versatility is key! The NuWave Oven excels at cooking a wide range of foods. For roasting meats and poultry, utilize the extender ring for larger items and monitor internal temperature for doneness. Baking and desserts require slightly lower temperatures and may benefit from the baking pan accessory.

Vegetables and side dishes cook quickly and retain moisture thanks to infrared technology. Experiment with cook times to achieve desired tenderness. Remember, the 3-way cooking method ensures even heating and flavorful results across all food types. Consult the recipe book for specific guidance.
Roasting Meats and Poultry
Achieve succulent results! Roasting with the NuWave Oven delivers incredibly moist and flavorful meats and poultry. Utilize the extender ring to accommodate larger birds or roasts, ensuring even heat circulation. Preheating isn’t always necessary, but can enhance browning.
For optimal cooking, consider using a meat thermometer to monitor internal temperature. Infrared heat penetrates deeply, sealing in juices. Remember to adjust cooking times based on weight and desired doneness. The NuWave Oven’s speed means checking frequently is crucial to avoid overcooking.
Baking and Desserts
Delicious baked goods are within reach! The NuWave Oven excels at baking cookies, cakes, and pies, offering faster cooking times and even heat distribution. Utilize the included baking pan for best results. Lower temperatures are often sufficient due to the oven’s efficient heating.
Monitor closely, as baking times will be significantly reduced compared to a conventional oven. For delicate pastries, consider using a lower power setting. Experiment with recipes, adjusting times as needed. The sealed environment helps retain moisture, creating tender and flavorful desserts.
Vegetables and Side Dishes
Unlock vibrant, flavorful vegetables! The NuWave Oven’s infrared technology cooks vegetables quickly, preserving nutrients and creating a delightful crisp-tender texture. Minimal preheating is required, saving time and energy. Use the included rack for optimal air circulation and even cooking.
Experiment with roasting root vegetables like potatoes and carrots for caramelized goodness. Steaming is also effective – simply add a small amount of water to the cooking chamber. Monitor cooking times closely, as vegetables cook rapidly. Enjoy perfectly cooked side dishes with minimal effort!
Accessories and Their Uses
Maximize your NuWave Oven’s versatility! Several accessories enhance its functionality. The rack promotes even cooking and is ideal for roasting or dehydrating. The extender ring increases cooking capacity, accommodating larger dishes or whole chickens – essential for family meals or gatherings.
Baking pans, specifically designed for the NuWave Oven, ensure optimal heat distribution for desserts and baked goods. Utilizing these accessories unlocks the full potential of your oven, expanding your culinary possibilities. Refer to the recipe book for specific accessory recommendations for each dish.
Racks and Baking Pans
NuWave Oven racks are crucial for elevating food, ensuring 360-degree heat circulation for even cooking and optimal browning. They’re perfect for roasting, dehydrating, or simply preventing food from sitting in drippings. Baking pans, designed specifically for the NuWave, distribute heat efficiently, yielding perfectly baked goods and casseroles.
Using standard baking ware may impact performance. Always check the recipe book for recommended rack positions and pan types. Proper accessory usage guarantees consistent results and unlocks the oven’s full potential. Cleaning these components after each use maintains hygiene and extends their lifespan.
Extender Ring – Increasing Cooking Capacity
The NuWave Extender Ring significantly boosts your oven’s versatility, allowing you to cook larger meals or accommodate bigger cuts of meat, poultry, or even a whole chicken. It creates additional cooking space without compromising the oven’s efficient infrared, conduction, and convection heating system.
Simply attach the extender ring to the dome before operation. Remember to adjust cooking times accordingly, as increased volume may require slightly longer durations. This accessory is ideal for family gatherings or batch cooking. Always ensure proper fit and stability before use for safe and effective operation.
Cleaning and Maintenance
Regular cleaning ensures optimal performance and longevity of your NuWave Oven. Always disconnect the power before cleaning. The cooking chamber can be wiped down with a damp cloth and mild detergent after each use, avoiding abrasive cleaners. The dome and other components should be cleaned similarly, ensuring all food residue is removed.
Avoid immersing the base in water. For stubborn stains, a paste of baking soda and water can be effective. Proper maintenance prevents buildup and maintains efficient heat distribution. Refer to the included manual for detailed cleaning instructions and safety precautions.
Cleaning the Cooking Chamber
After each use, allow the cooking chamber to cool completely before cleaning. Wipe down the interior surfaces with a soft, damp cloth and a mild dish soap solution. Avoid abrasive cleaners or scouring pads, as these can damage the non-stick coating. For baked-on food residue, soak the chamber with warm, soapy water for easier removal.
Ensure all soap residue is thoroughly rinsed away with a clean, damp cloth. Dry the chamber completely before reassembling and using the oven. Regular cleaning maintains optimal cooking performance and prevents odors.
Cleaning the Dome and Other Components
The NuWave Oven dome should be cleaned regularly to maintain optimal performance. Wipe the dome’s interior and exterior with a soft, damp cloth and mild dish soap. Avoid harsh chemicals or abrasive materials that could scratch the surface. The extender ring and other removable components can be washed in warm, soapy water or placed in the dishwasher if dishwasher-safe.
Always ensure all parts are completely dry before reassembling. Proper cleaning extends the life of your NuWave Oven and ensures hygienic food preparation. Inspect components for damage during cleaning.
Troubleshooting Common Issues
If your NuWave Oven isn’t heating, first check the power cord and outlet. Ensure the unit is properly assembled, as safety mechanisms prevent operation if components are misaligned. For uneven cooking, try rotating the food during the cooking process or adjusting the rack position. Confirm the correct cooking time and temperature are selected for your dish.
If problems persist, consult the full instruction manual or contact NuWave customer support. Avoid attempting repairs yourself, as this could void the warranty and pose a safety risk. Regular maintenance can prevent many issues.
Oven Not Heating
If the NuWave Oven fails to heat, begin by verifying the power cord is securely plugged into a functioning outlet. Test the outlet with another appliance to confirm it’s receiving power. Next, ensure the oven base and cooking dome are correctly assembled; a safety interlock prevents operation if improperly aligned.
Check the digital control panel (Pro Plus model) for any error messages. If the issue continues, consult the complete instruction manual for detailed troubleshooting steps or contact NuWave customer support for assistance. Do not attempt self-repair.
Food Not Cooking Evenly
Uneven cooking can occur if food is overcrowded within the cooking chamber, blocking infrared heat distribution. Ensure sufficient space around the food item for optimal heat penetration. Utilizing the extender ring appropriately can help with larger portions, but avoid overfilling.

Rotating food halfway through the cooking process is recommended, especially for larger cuts of meat or poultry. Verify the temperature settings are accurate and adjust as needed. Proper rack placement also contributes to even cooking; experiment with different positions.
Safety Precautions
Always exercise caution when operating the NuWave Oven. Never touch the dome or cooking surface during or immediately after use, as these components reach extremely high temperatures, potentially causing severe burns. Ensure the oven is placed on a stable, heat-resistant surface away from flammable materials.
Disconnect the oven from the power source before cleaning or performing maintenance. Avoid using abrasive cleaners that could damage the non-stick surface. Keep the oven out of reach of children. Do not immerse the base unit in water or any other liquid to prevent electrical hazards.
General Safety Guidelines
Prioritize safety during NuWave Oven operation. Always inspect the power cord for damage before each use; a damaged cord presents an electrical shock risk. Never operate the oven unattended. Ensure adequate ventilation around the unit to prevent overheating. Use oven mitts or pot holders when handling hot components, like the dome and cooking racks.
Avoid placing metallic objects inside the oven, excluding approved racks, as they can cause sparking. Do not attempt to repair the oven yourself; contact qualified service personnel for assistance. Keep the oven clean to prevent grease buildup, which could pose a fire hazard.
Avoiding Burns and Electrical Hazards
Protect yourself from burns! The NuWave Oven’s surfaces become extremely hot during operation. Always use oven mitts when handling the dome, racks, and cooked food. Exercise caution when opening the oven, as steam can escape and cause scalding. Never touch the heating element directly.
To prevent electrical hazards, never immerse the oven base in water or other liquids. Ensure the oven is properly grounded. Do not operate the oven with a damaged cord or plug. If the oven malfunctions, disconnect it immediately and seek professional repair. Keep the oven away from flammable materials.
Recipe Book and Instructional DVD
Unlock culinary possibilities with the included recipe book! It’s packed with diverse dishes tailored for your NuWave Oven, from succulent roasts to delightful baked goods. The book also serves as a comprehensive owner’s manual, detailing operation and care.
Complementing the book is the instructional DVD. This visual guide demonstrates optimal cooking techniques, maximizing the oven’s potential. Follow along to learn how to utilize the 3-way cooking method effectively. Both resources are designed to ensure you achieve consistently delicious results and confidently explore the NuWave Oven’s capabilities.
Utilizing the Included Recipe Book
Dive into a world of flavor with the NuWave Oven’s recipe book! It’s more than just a collection of dishes; it’s a guide to mastering infrared cooking. Begin by browsing the diverse selection, noting the recommended cooking times and temperatures for each recipe.
Pay close attention to the preparation instructions, as they are specifically designed for the NuWave Oven’s unique heating capabilities. The book also functions as an owner’s manual, offering valuable tips on maintenance and troubleshooting. Experiment, adapt, and enjoy creating delicious, healthy meals with ease!
Following the Instructional DVD for Optimal Results
Maximize your NuWave Oven experience by thoroughly watching the included instructional DVD. This visual guide demonstrates proper setup, operation, and cooking techniques, ensuring you unlock the oven’s full potential. Pay close attention to demonstrations of the 3-way cooking method – infrared, conduction, and convection – and how each contributes to perfectly cooked food.
The DVD also highlights accessory usage and cleaning procedures. Following these instructions will not only improve your cooking results but also extend the lifespan of your NuWave Oven. Consider it a personalized cooking class!
NuWave Oven vs. Air Fryer: Key Differences
While both offer convenient cooking, the NuWave Oven and Air Fryer differ significantly. The NuWave Oven utilizes infrared, conduction, and convection heat for versatile cooking – roasting, baking, and more – often cooking food faster while retaining moisture. Conversely, an Air Fryer primarily employs rapid air circulation to mimic deep-frying, creating crispy textures.
The NuWave Oven excels at cooking larger portions and a wider variety of dishes. Air fryers are generally better suited for smaller, crispy snacks and sides. Choosing between them depends on your cooking style and desired results – versatility versus crispiness.
Portability and Usage in RVs, Dorms, and Boats
The NuWave Oven’s compact size and lightweight design make it exceptionally portable, a significant advantage for those with limited kitchen space. It’s ideal for recreational vehicles (RVs), college dorm rooms, and even boats where conventional ovens are impractical or unavailable. Its efficient operation also minimizes energy consumption, crucial in environments with limited power sources.
Being a self-contained unit, it eliminates the need for extensive installation. Simply plug it in and cook! This convenience, combined with its versatility, makes the NuWave Oven a valuable addition to any compact living or travel situation, offering home-cooked meals on the go.